How Can We Help?
Tutorial : High Kick
In this tutorial we’ll create a high kick animation using all posing tools available in MotionMuse. We’ll also use a video reference in order to create the animation. The processes presented in this tutorial applies to pretty much any animation / character and are not specific to the high kick animation.
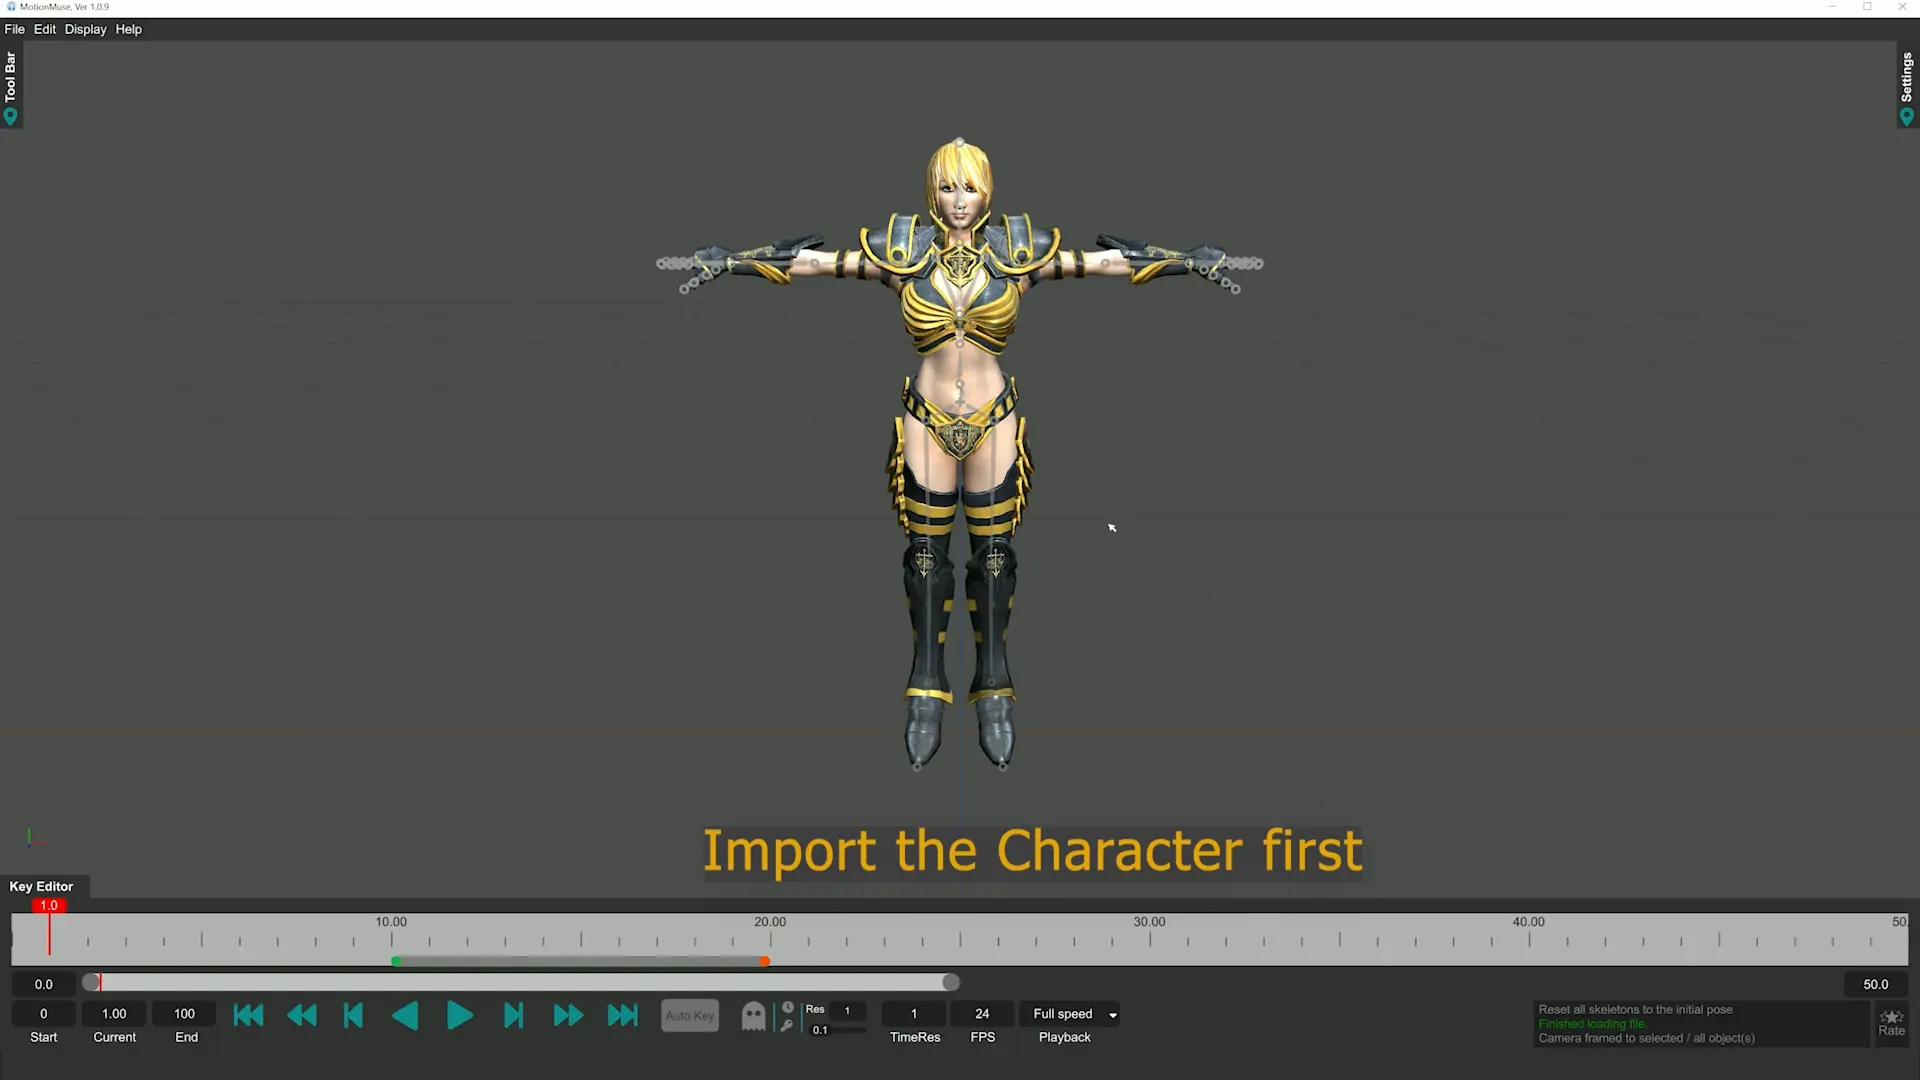
First, we start by loading the character into the scene, this can be done by using the File->Import menu option. In the import dialog we can browse to the file and import the character. Once imported the scene should have a character in it as shown below.
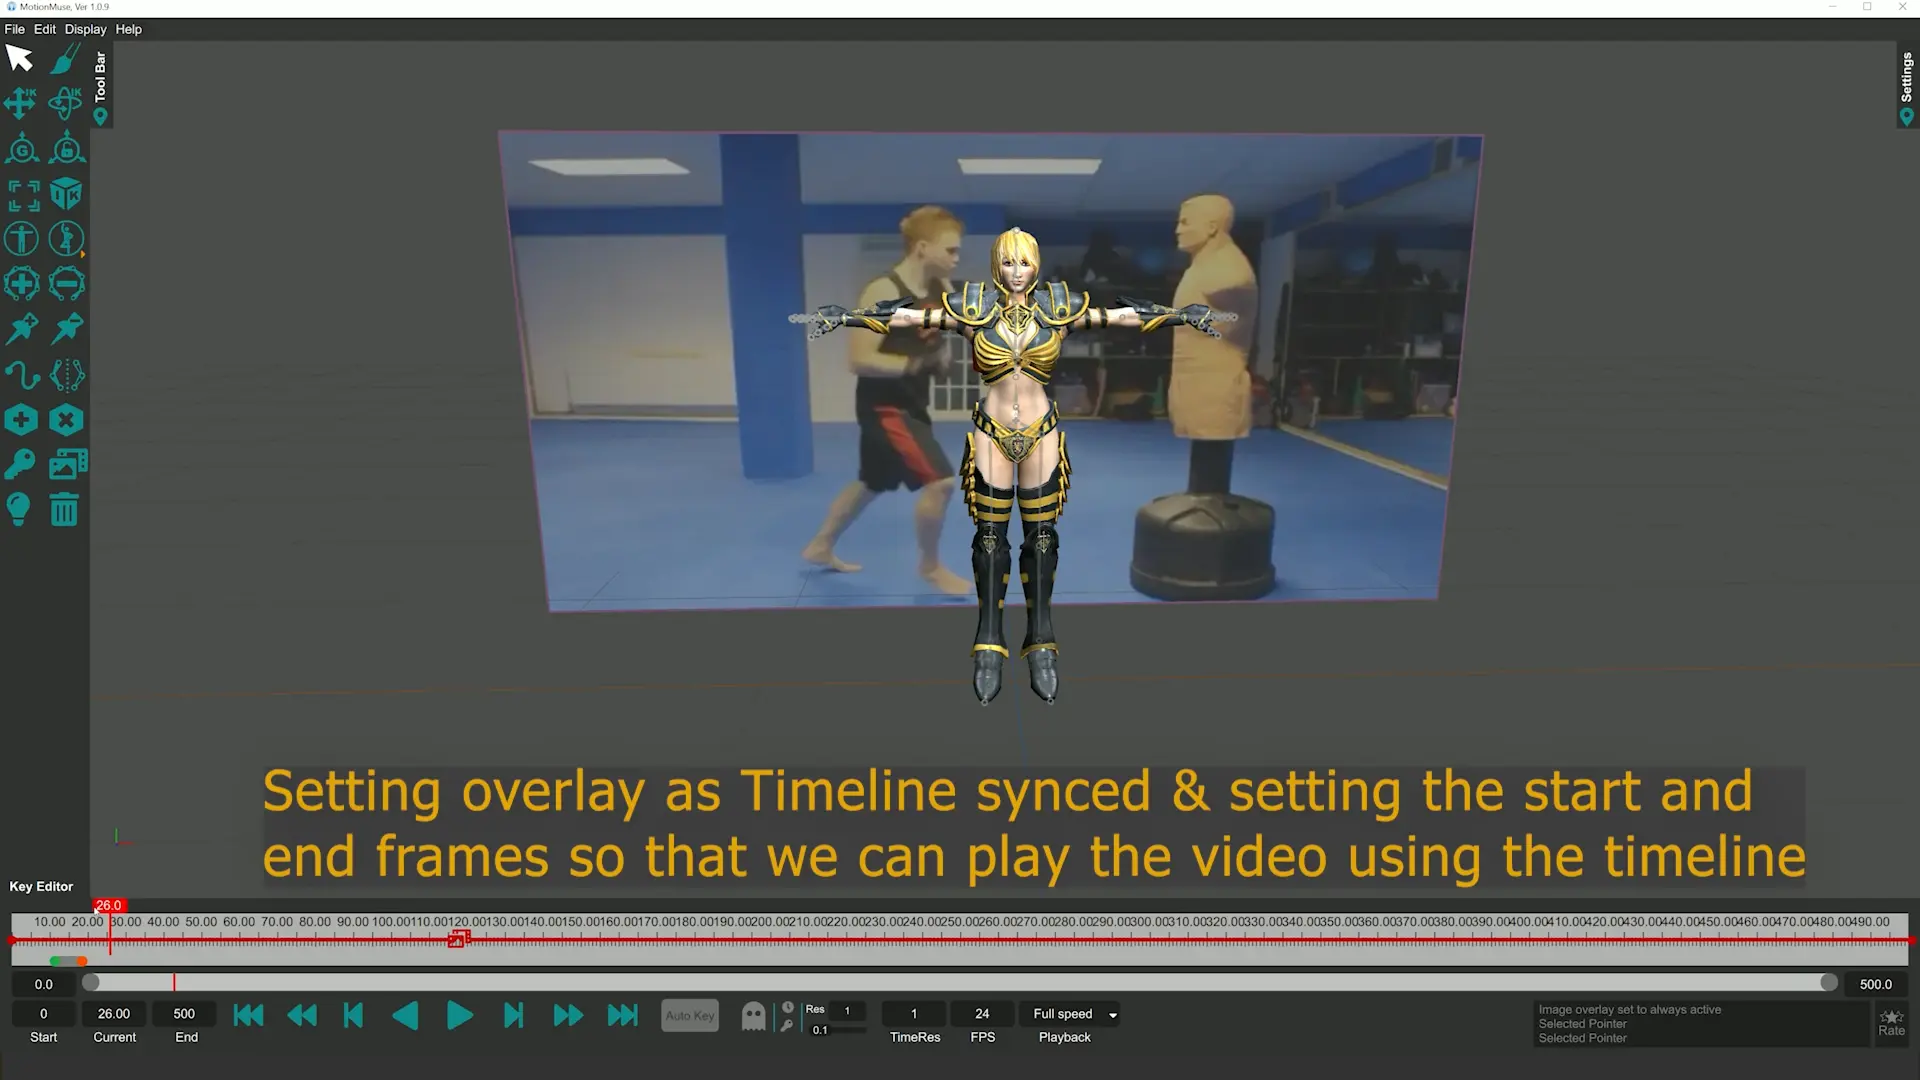
Next, we need to import the reference video into the scene. In order to give us more space for video playback, we can set the end frame to 500 and move the timeline slider to view the entire 0-500 timeline range. To load the video we first create a Media Overlay and import the video using the “Load Media” button in the Media Overlay tool bar. We browse and select our video and it should show up as a 2D image. We need to adjust the Transparent Color (anything other than white) in order to properly see the video frames. Next we move the video to the 3D viewport by toggling the 2D/3D button. In order to playback the video using the timeline we need to Sync the video to the timeline using “Timeline Synced” button. As soon as the the video is synced to the timeline we’ll see two bars appear alongside the Media Overlay icon. Drag these bars to the 0th and 500th frame respectively so that we can use the entire timeline to playback the video. Once done the video should appear as follows in the viewport and should play if we use the play animation button or drag the Current frame Slider.
Now we are ready to pose our first key frame. To make our lives easier we can move the Media Overlay to match the character’s size and location so that we can easily trace out the pose. We can simply use the rotate, scale and move gizmos to do this. Transparency of the Overlay can also be set to our desired preference to properly view the character.
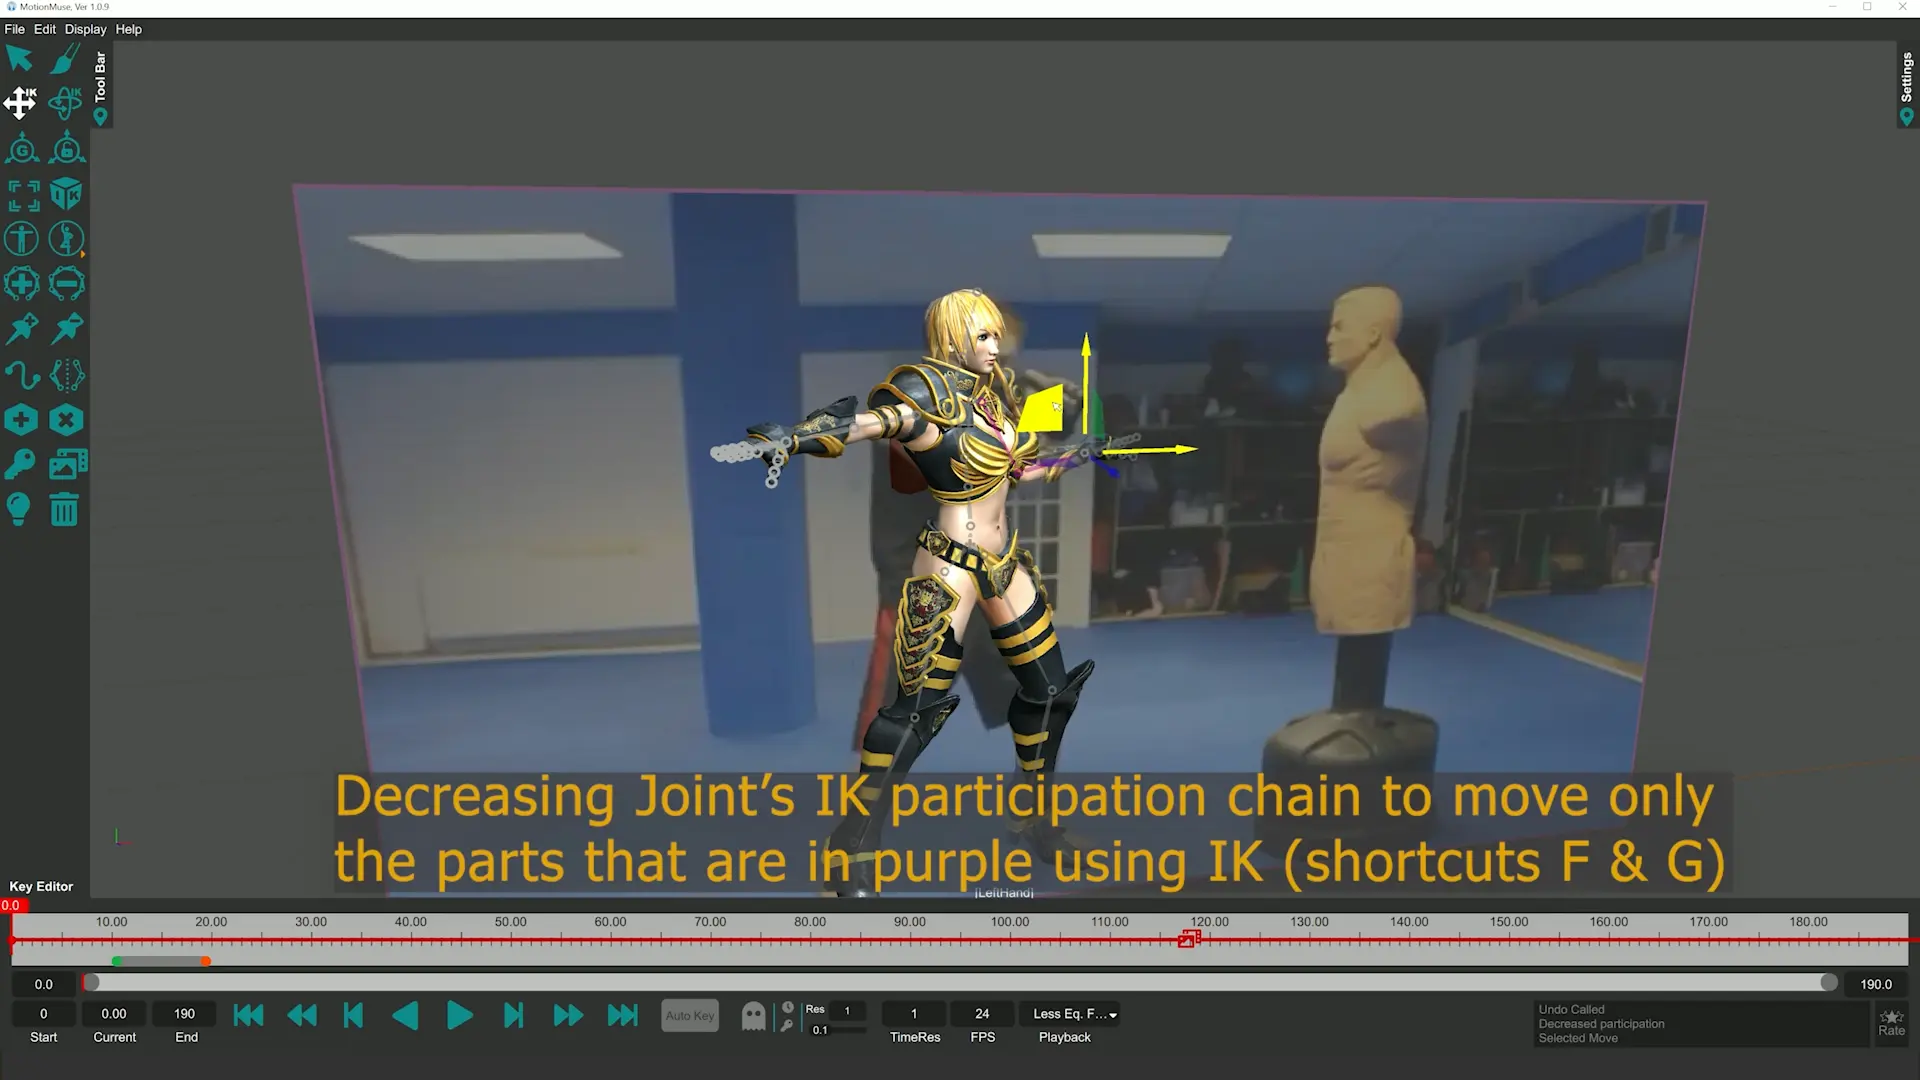
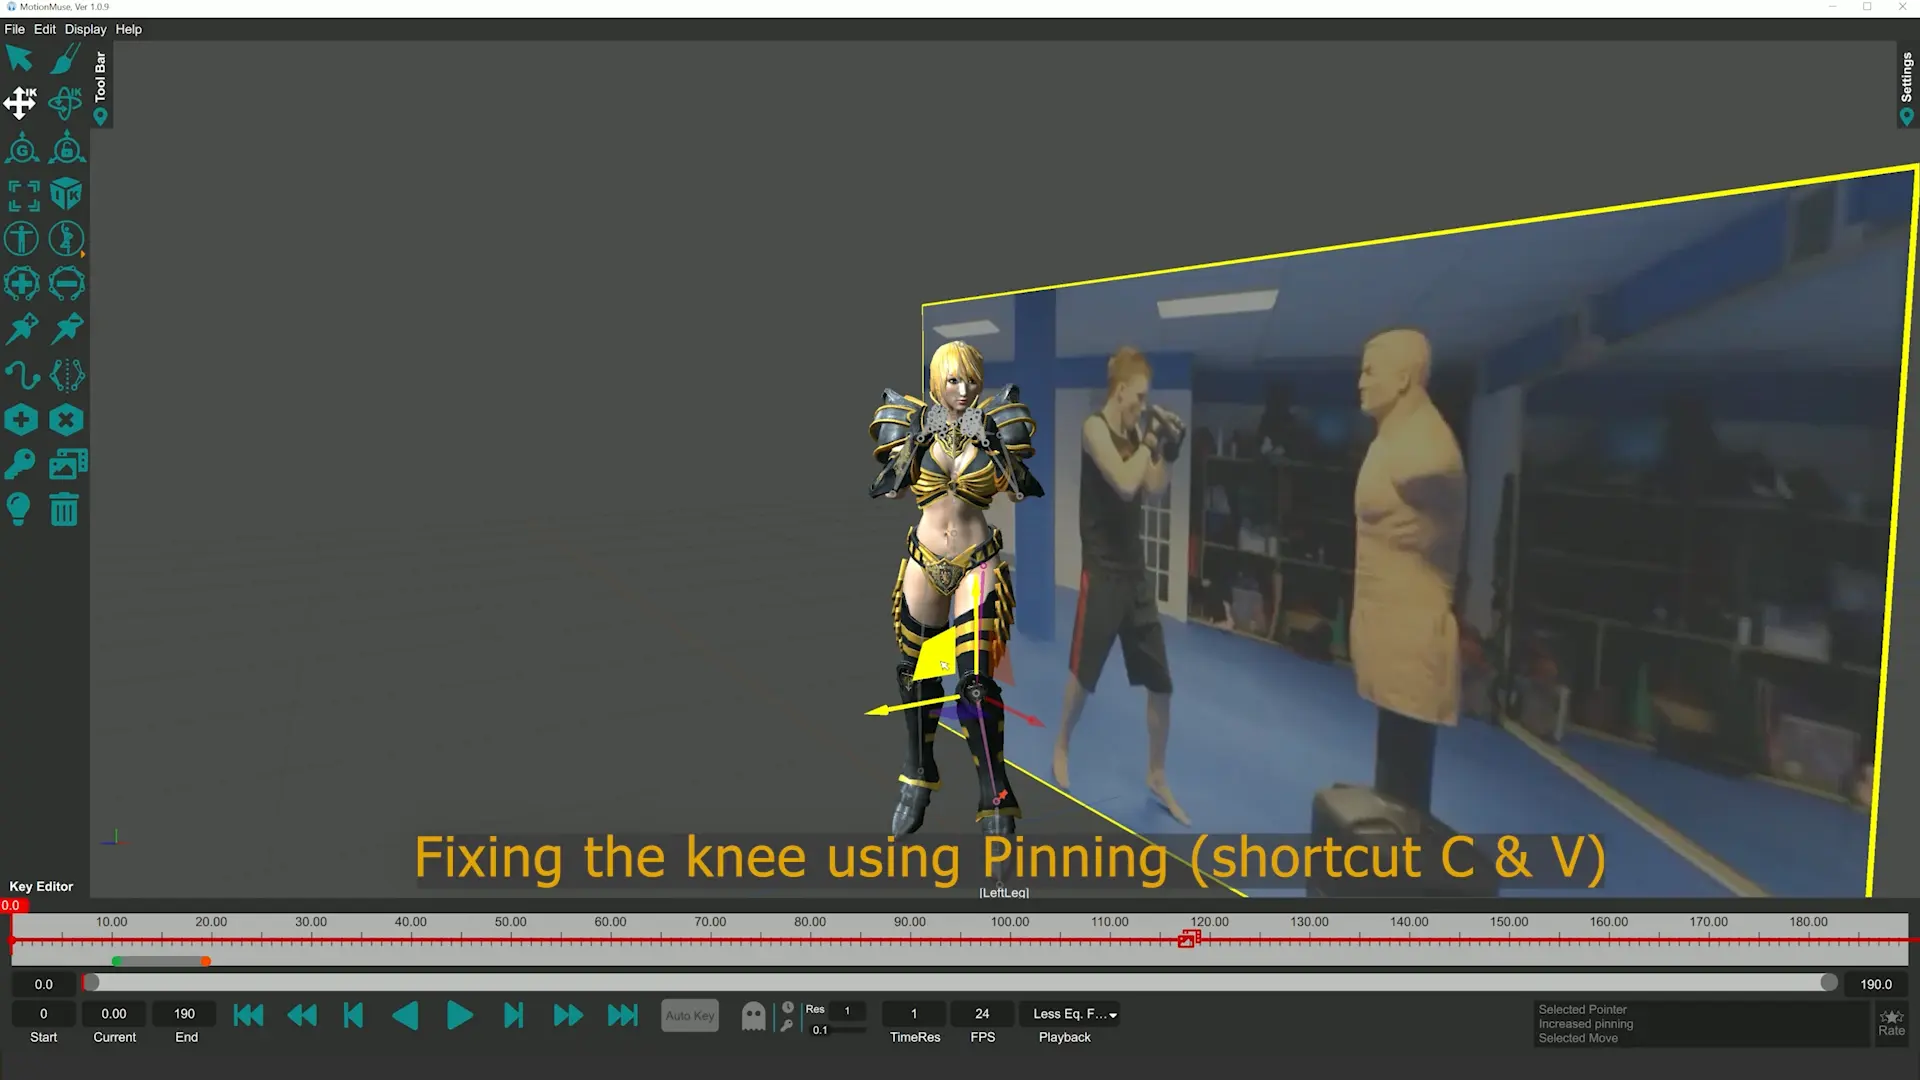
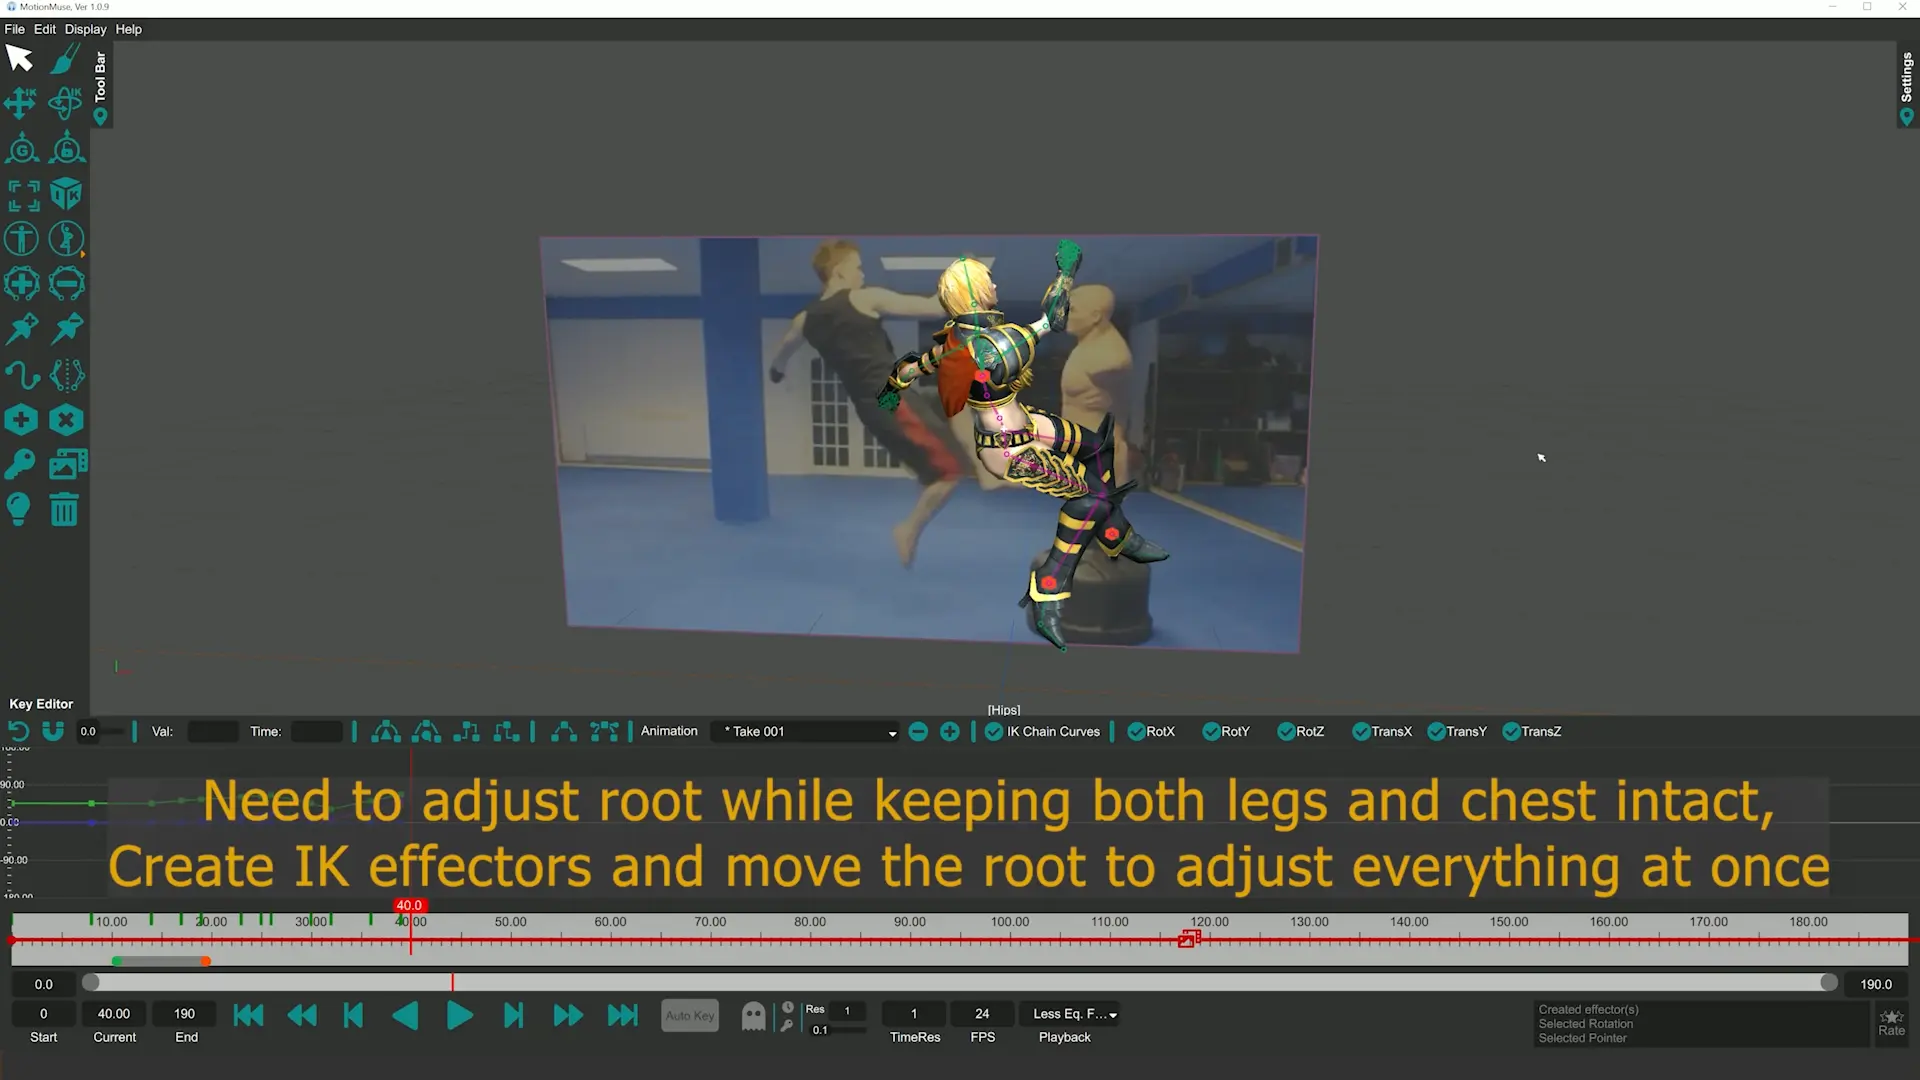
We can then use Sketching (keyboard shortcut Hold S), Inverse Kinematics, Forward Kinematics (shortcut Hold Control) and IK Effectors (shortcut key Y) to pose our character. In order to move certain parts of the body we typically use IK, which moves all joints/bones shown in purple for the selected joint(s). We can increase or decrease this chain using IK participation (shortcut F & G). This gives us on the fly control for each joint and allows us to move only some parts of the body at will. Creating a key for a selected joint will also key its IK chain (i.e. all purple joints). Using IK Effectors becomes essential in cases where we want some part of the body to stay put at its current position while we are manipulating other joints, which can be often. For simpler cases we can use Pinning (shortcuts C & V), shown in pink with a pin located a the end of the chain – this is typically useful when we want some joint down the IK chain to stay put while we modify a joint above it (for example moving the knee while keeping the ankle intact). For general cases IK Effectors are used, which can hold the position / orientation or both for given joints while other parts of the body are modified. A typical case is when moving the root joint w.r.t. other joints – for example feet, we want the feet to be planted when moving the root so that we do not experience foot sliding / shaking in the animation.
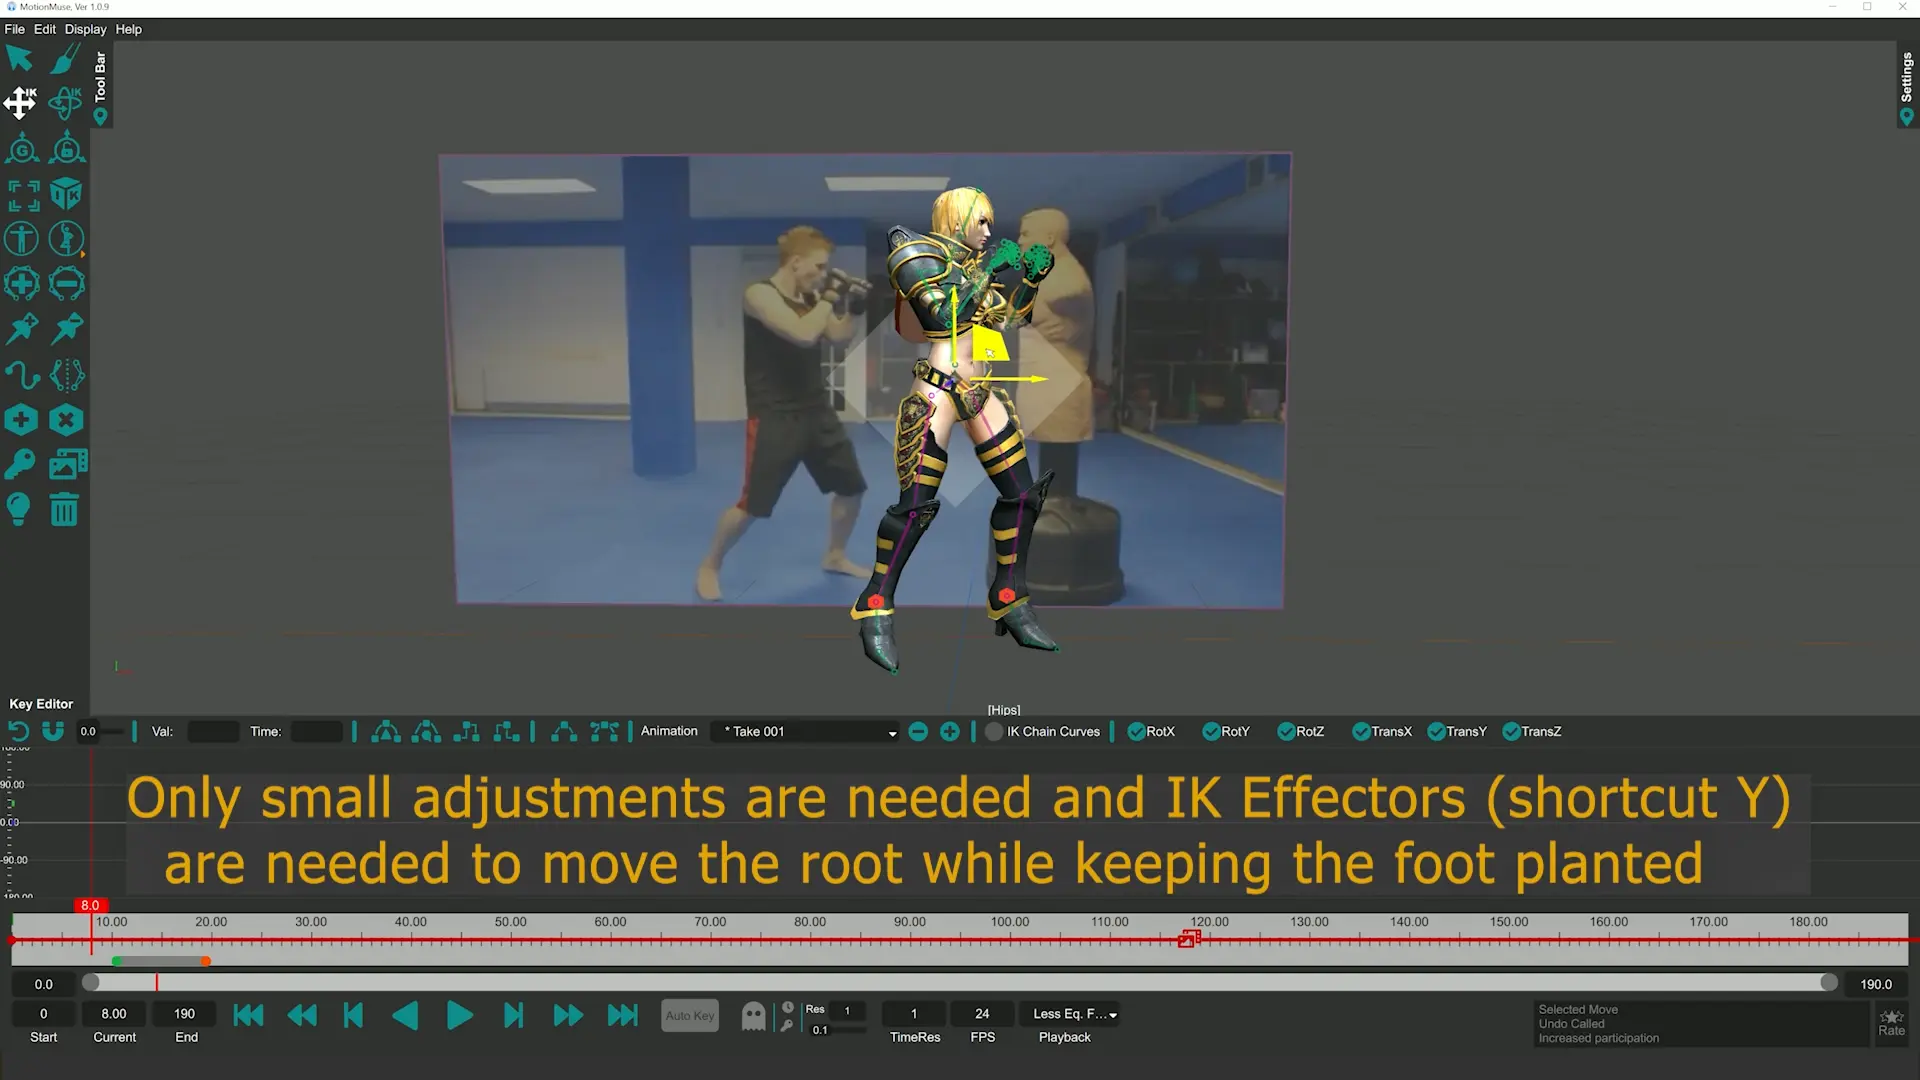
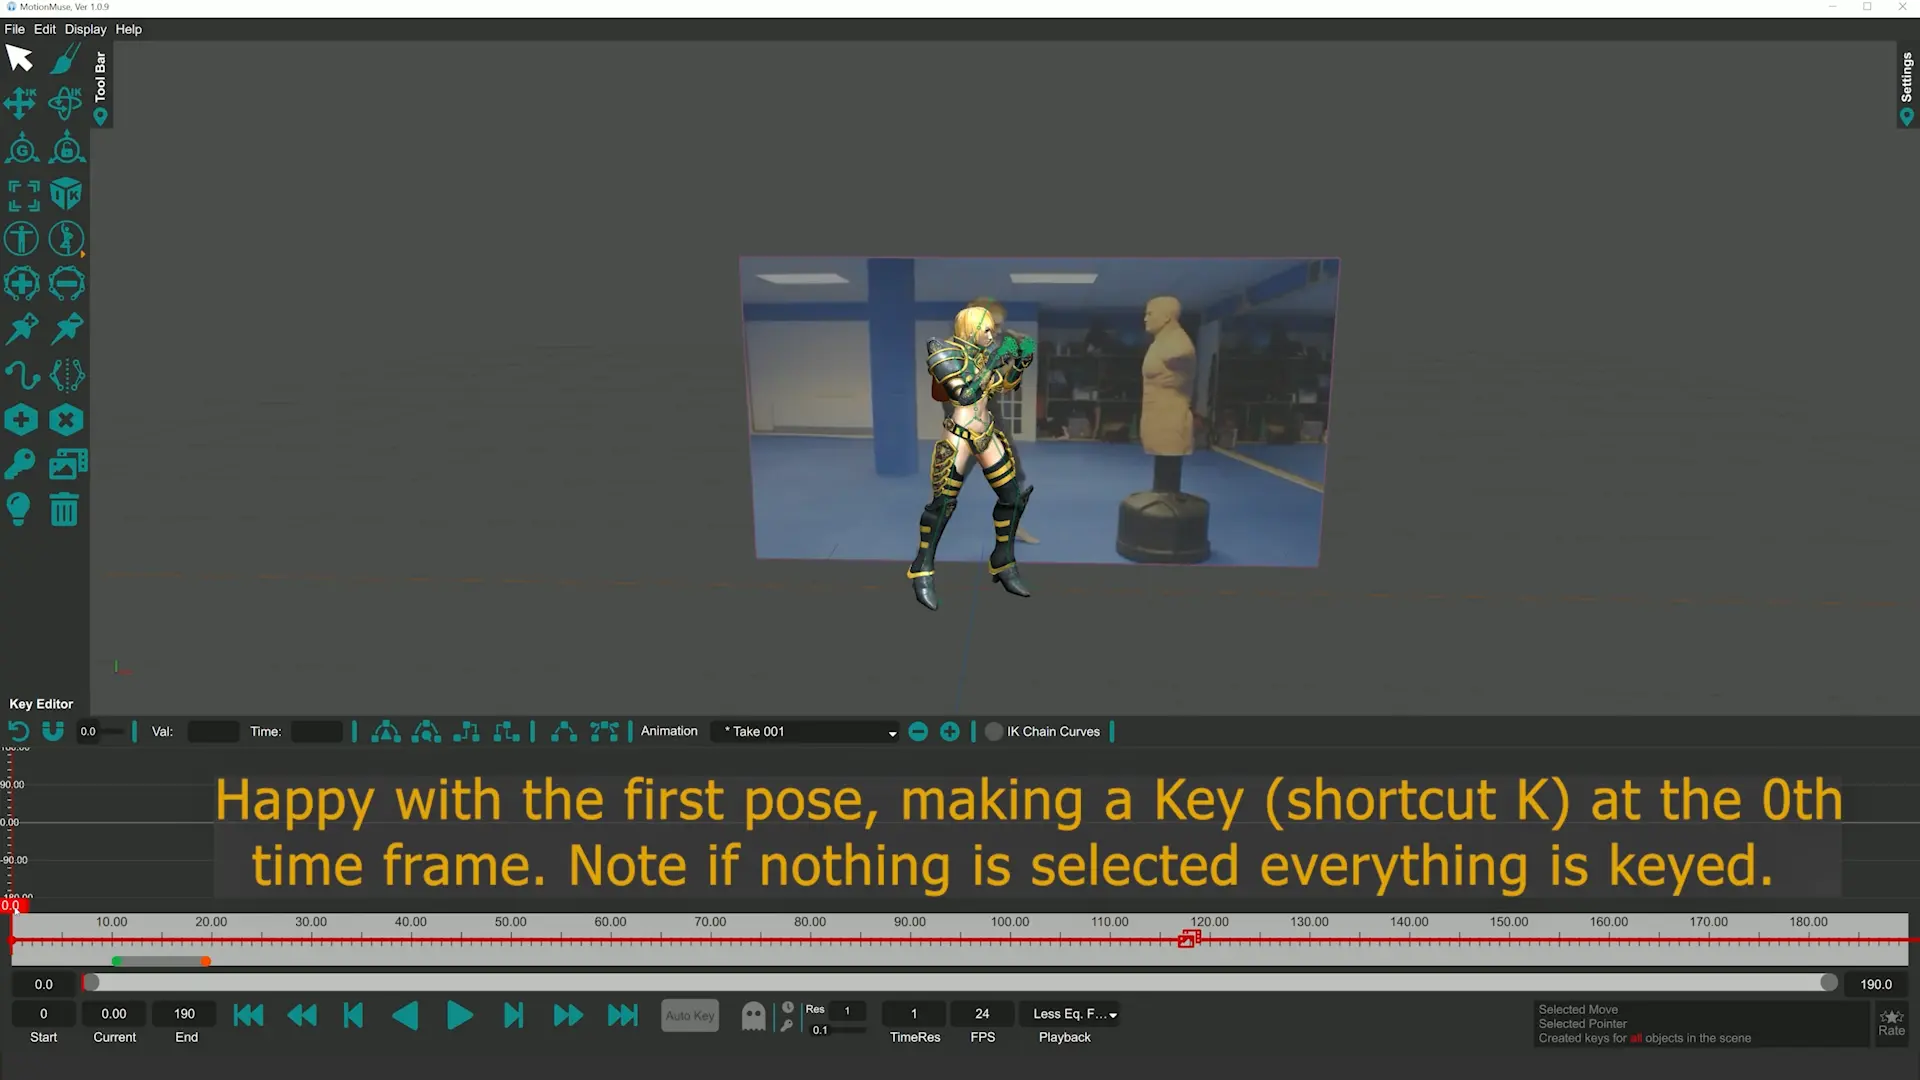
Once we are satisfied with the pose we must create a key at the 0th time frame (shortcut K) in order to save our work at the 0th frame value. Note that if nothing is selected every joint in the scene will be keyed. If a joint is selected then only the Joint and its corresponding IK chain (shown in purple) will be keyed. This is an important distinction as it allows us to set keys for independent joints at independent time frame values.
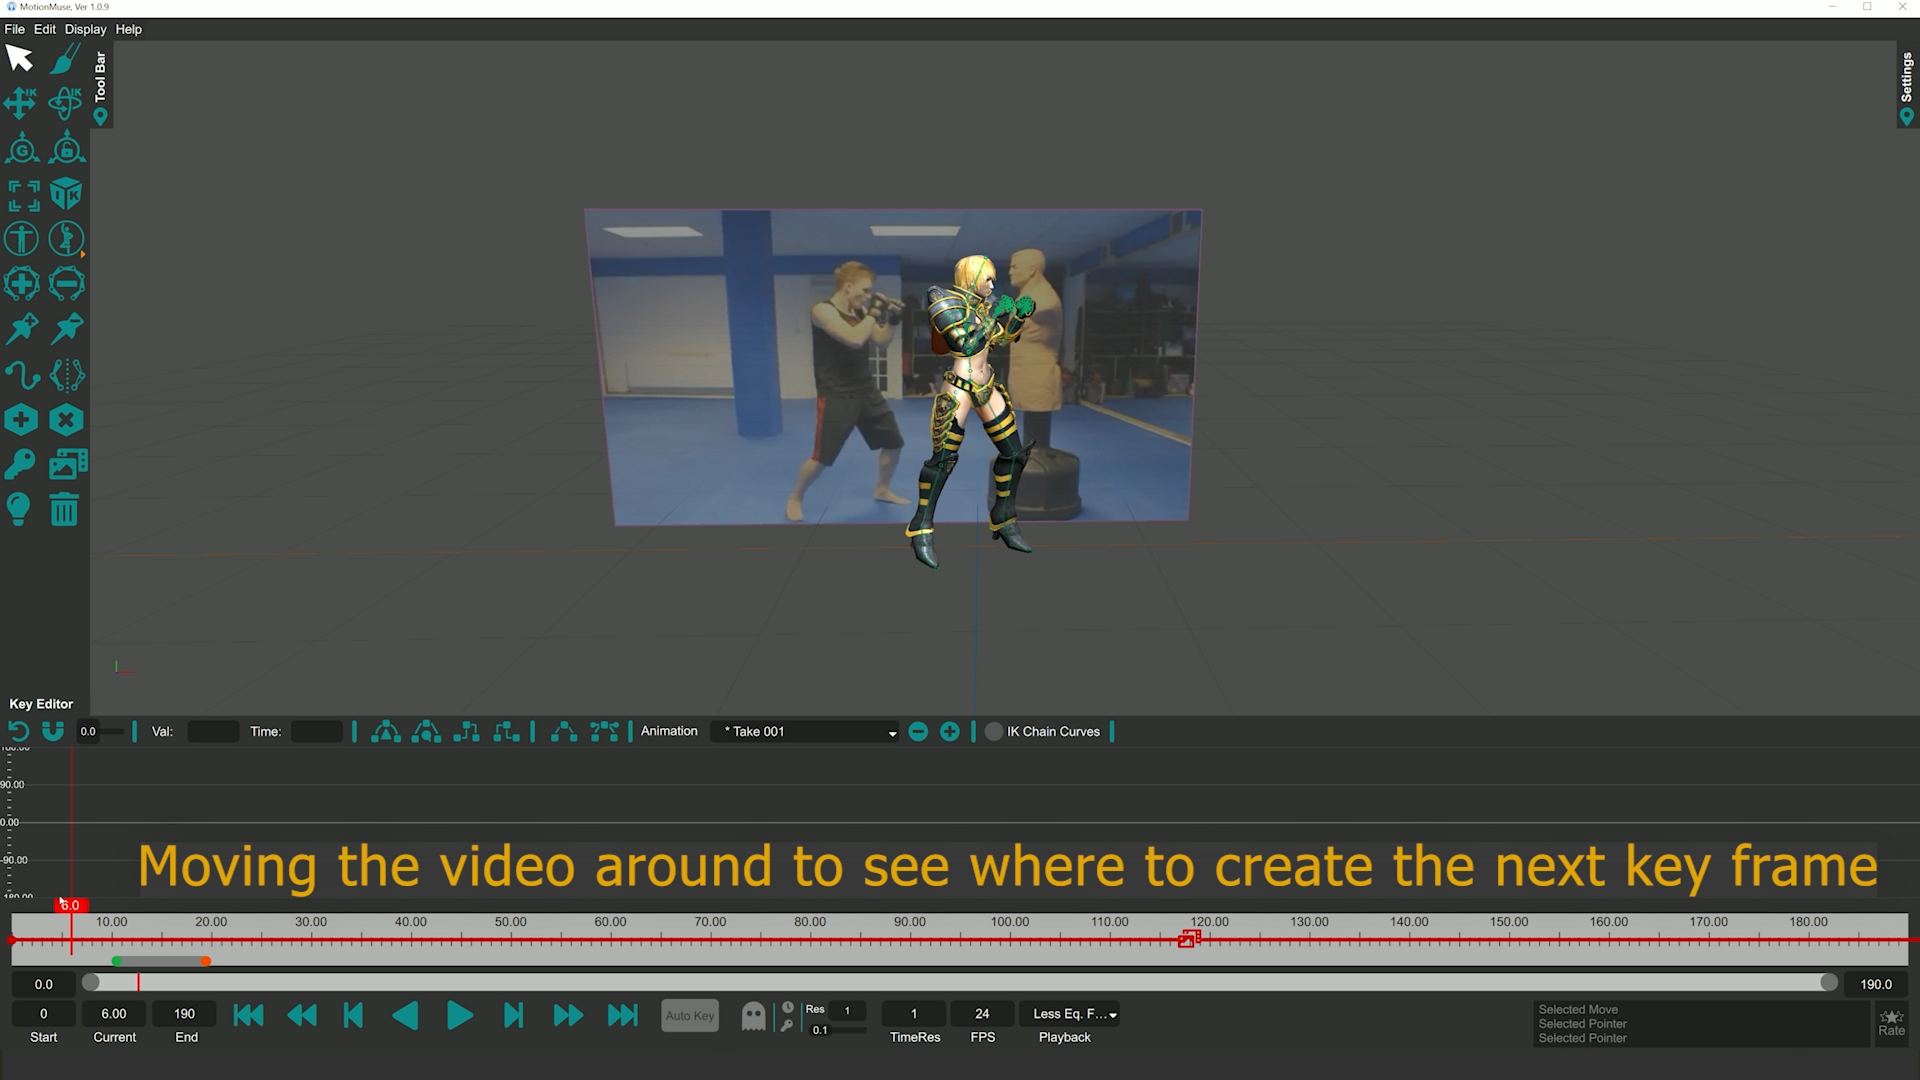
Next we can move the frame slider to find the next frame in the video which we think would be suitable for the next key frame. This comes of experience, typically if we have fast motion in the video our key frames will be closer together to capture the motion properly, for smoother motions we can have key frames further apart. Once we’ve decided on the key frame it is the similar process of modifying the pose using IK, FK and Sketching and then creating a key at that key frame to save the work.
If we are not satisfied with a key frame pose, we can overwrite it. To do so, go to the key frame using the frame slider and repose the character, then simply create a new key (make sure to deselect anything if we wish to overwrite everything). The new key will overwrite any existing key on the timeline and will set the new pose at that time frame.
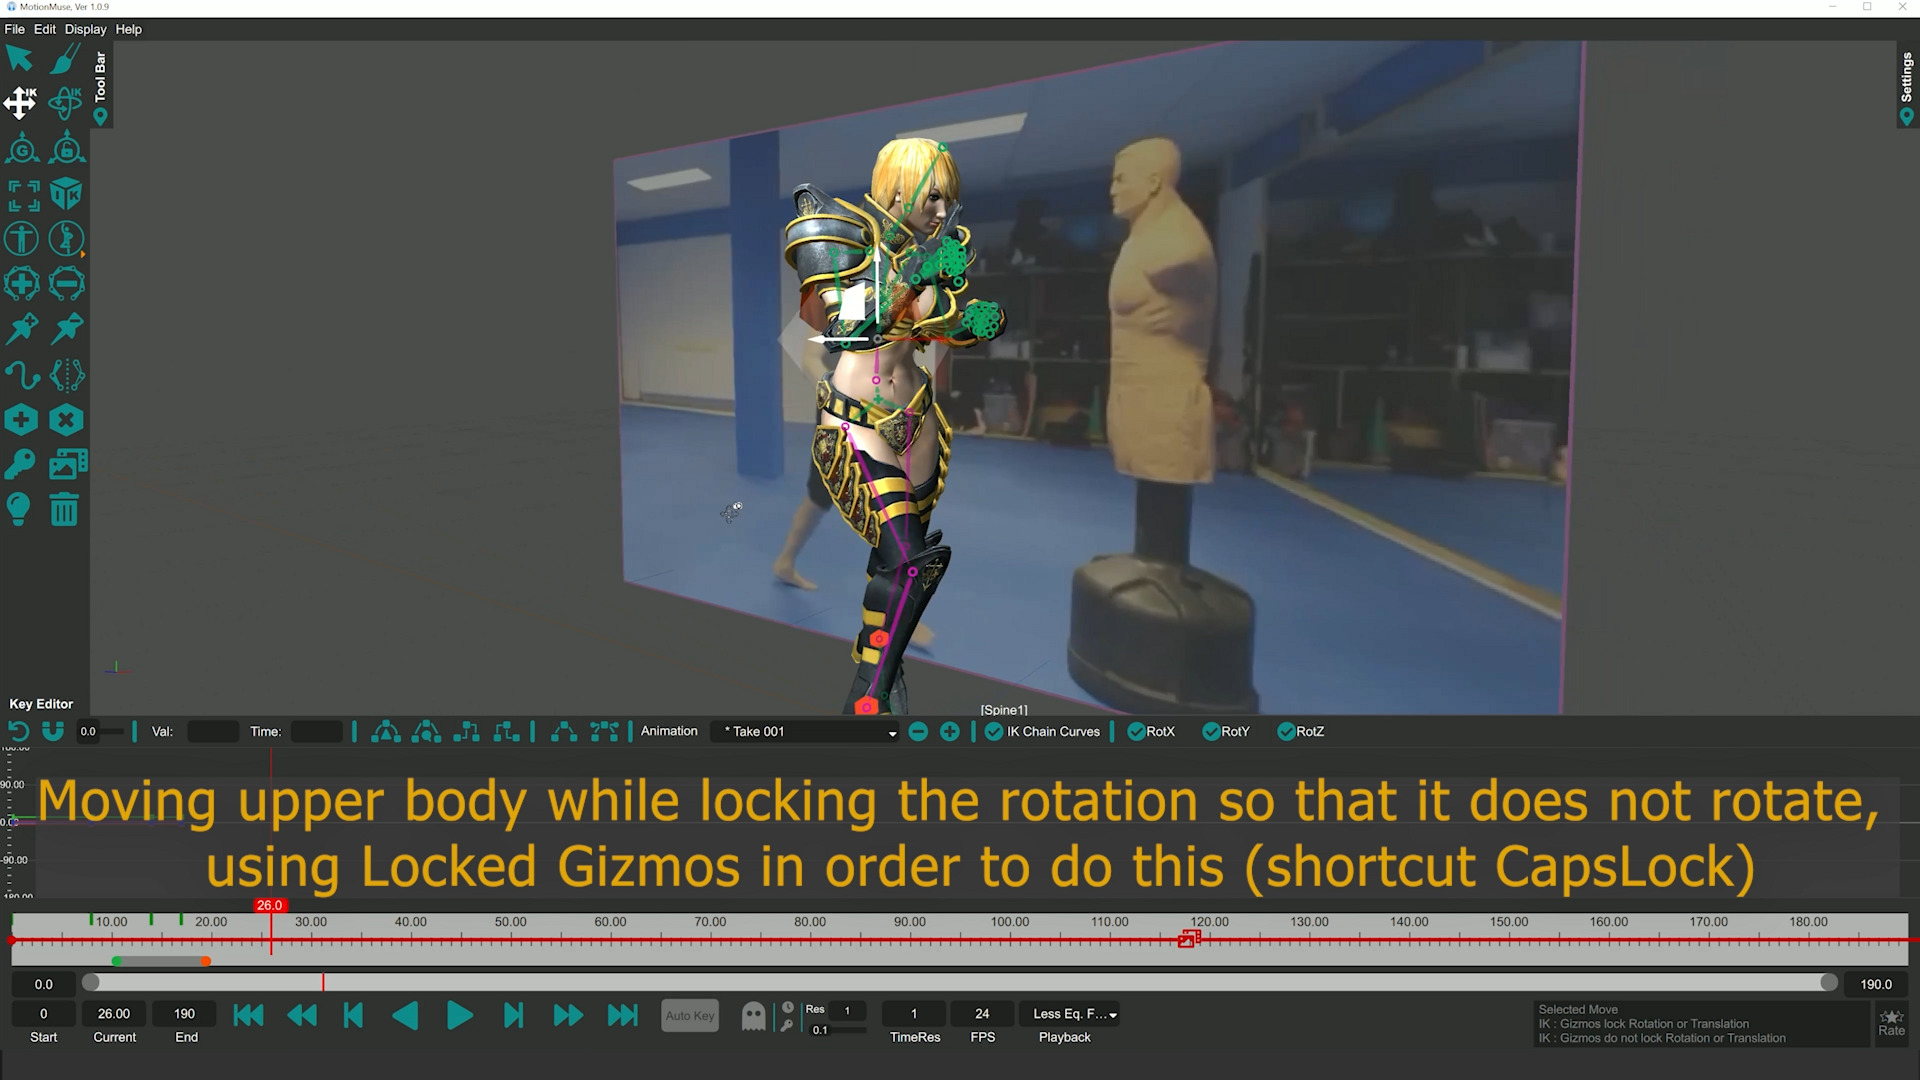
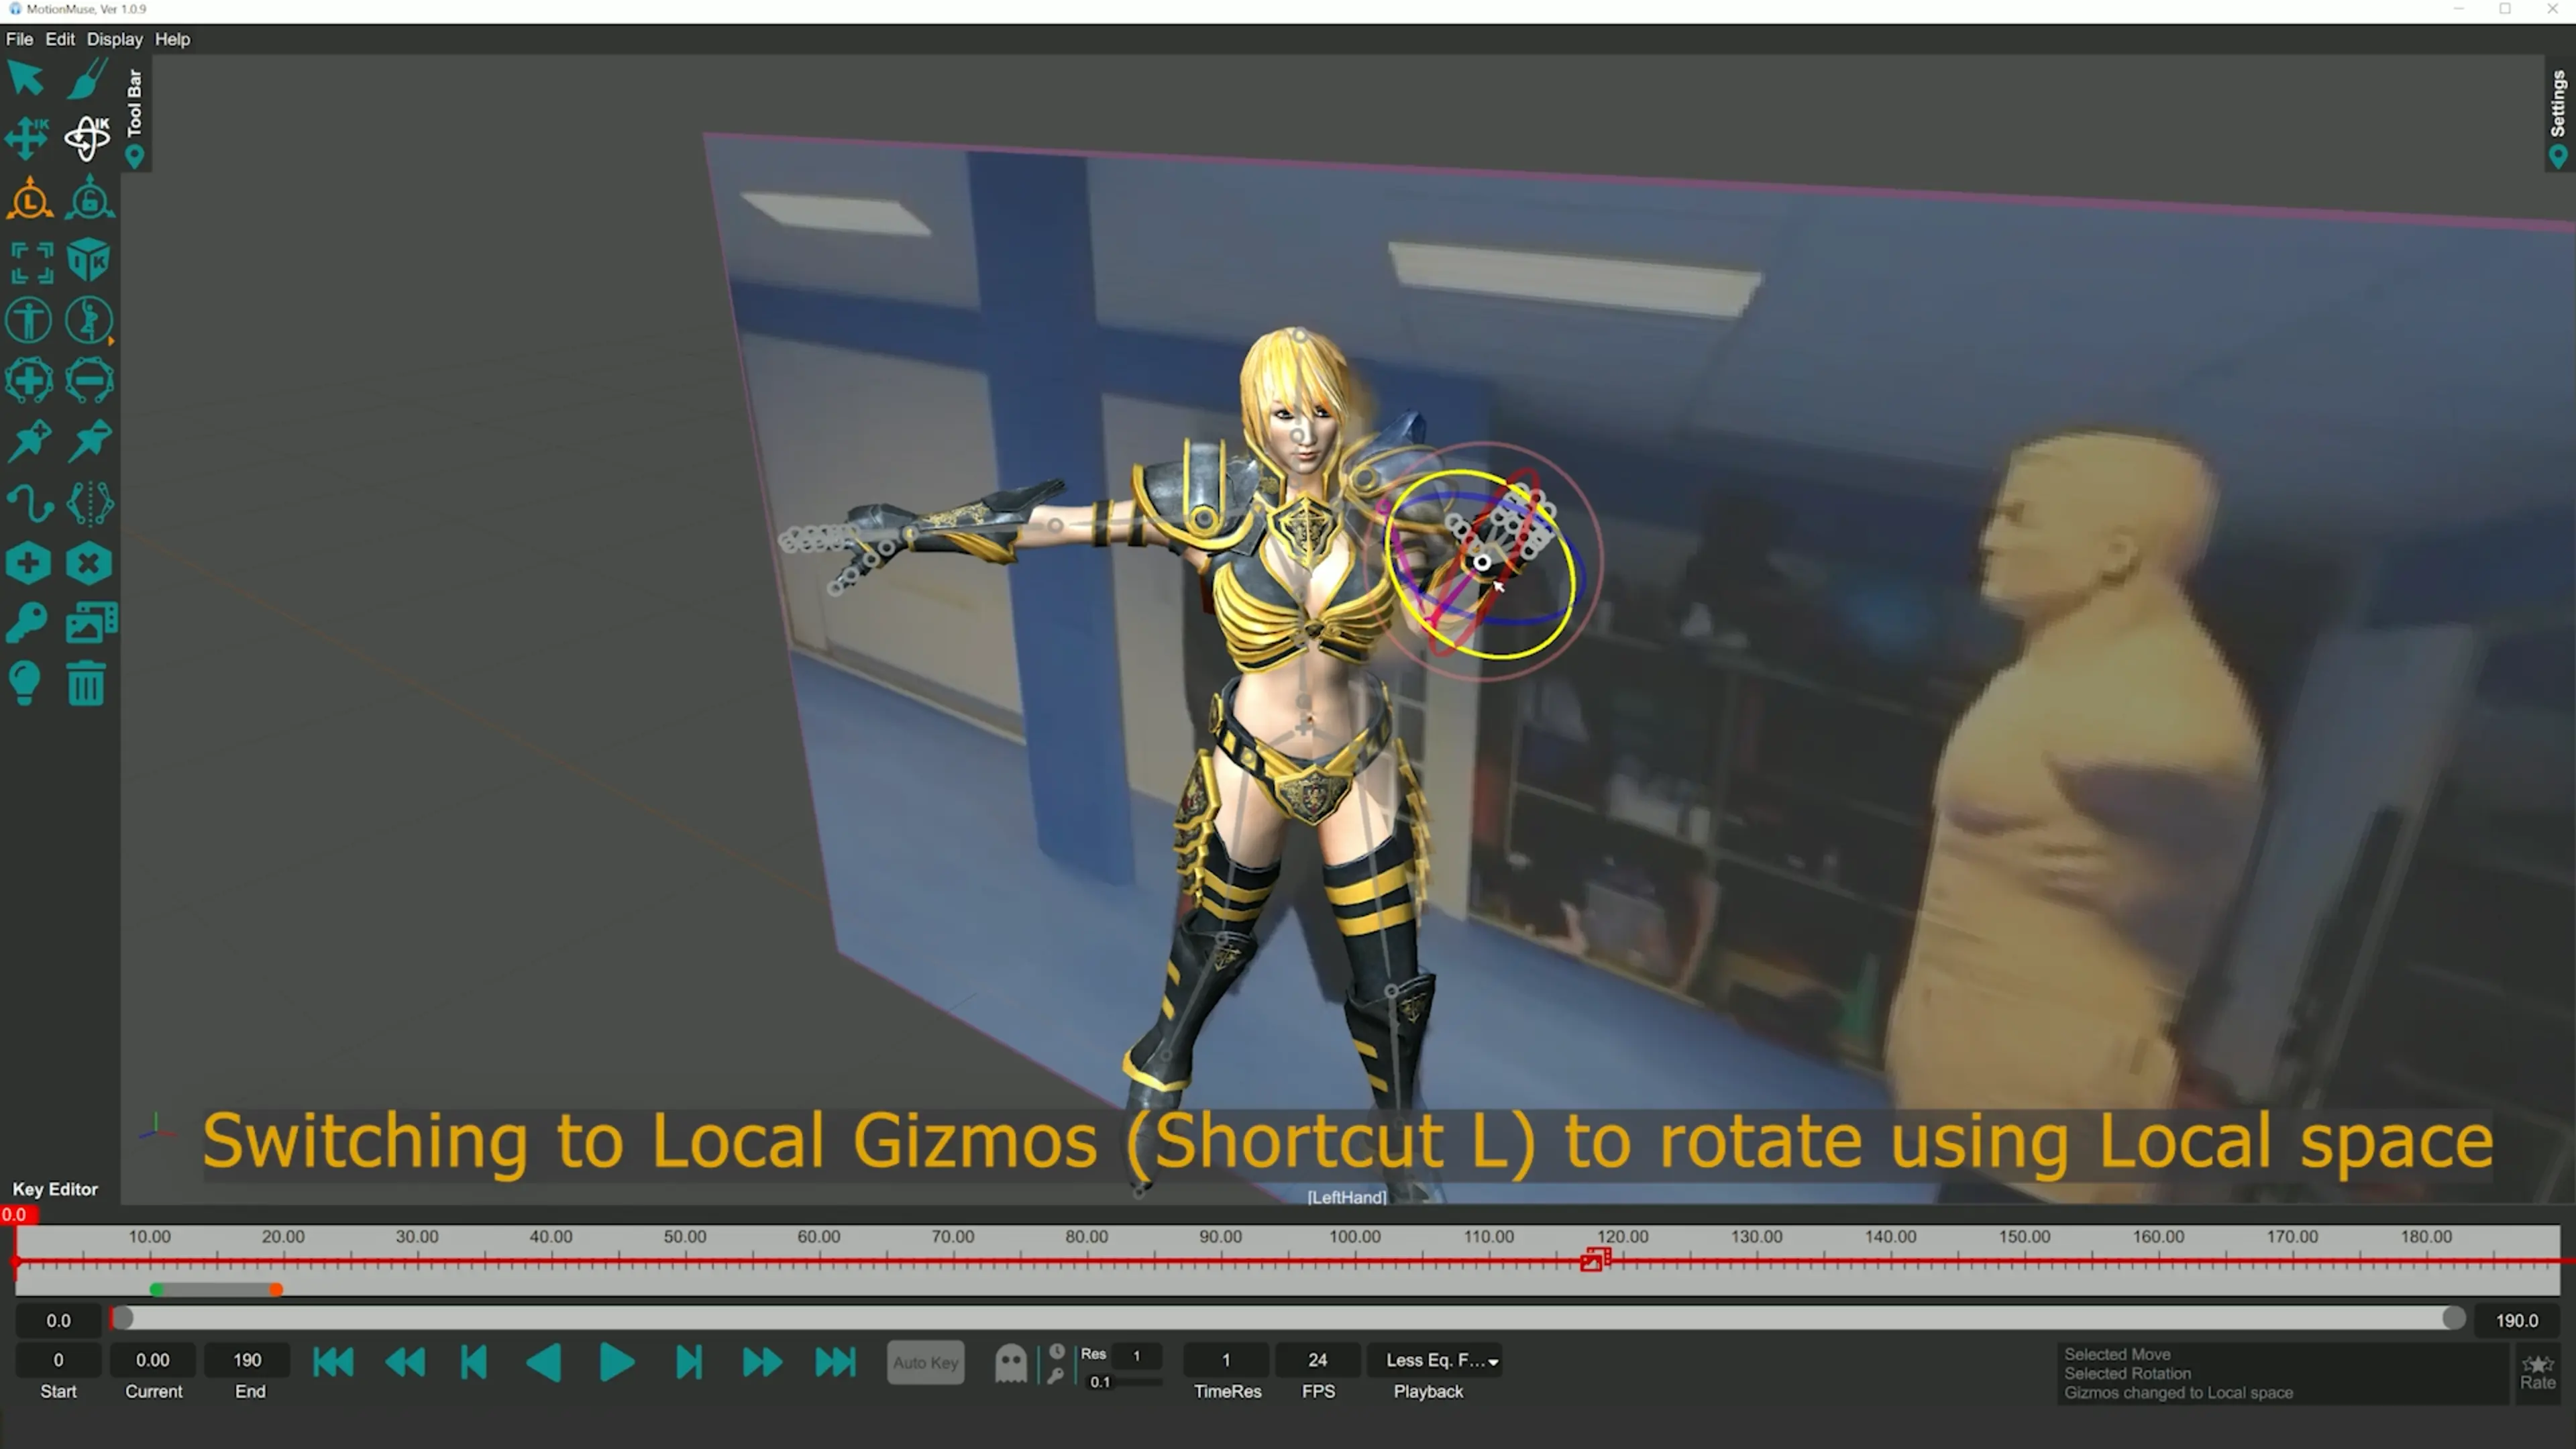
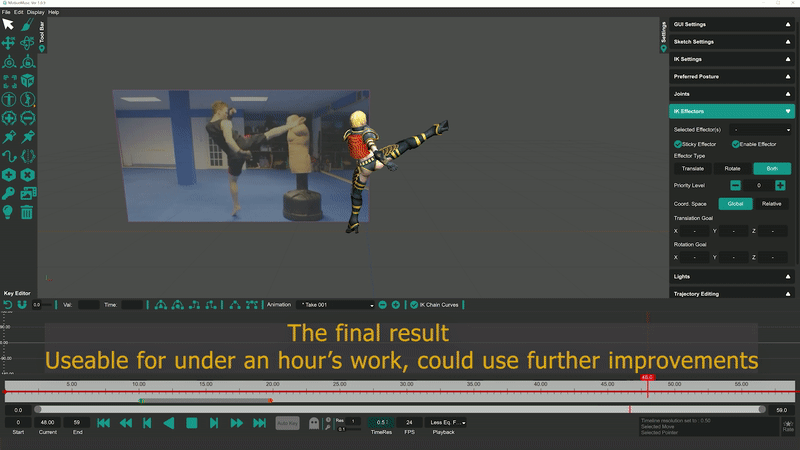
This process of creating the pose, keying it and refining it is repeated to create the entire animation. In certain cases we also use Locked Gizmos (shortcut CapsLock) and Local Space gizmos (shortcut L) to move only translation or rotation for the joint while keeping the other intact, and to move in the local coordinate system of the joint instead of the world space. In total we create 20 key frames and modify them for better motion smoothness in the overall animation. It took about an hour to create the given animation. The Output animation should appear as follows:
The overall process in real-time with explanation for each step of the animation is given in the following video (the video is slightly shorter than 1 hour because we trimmed some parts of the video and sped up others for the sake of brevity).