How Can We Help?
Weight Painting
Weights are assigned to each vertex of a Skinned mesh so that the mesh can be transformed using joints and bones. While posing a character, the user moves joints / bones using IK or FK and the new joint/bone positions are used to update the mesh vertices according to the weights associated with the corresponding vertex. In a general case there can be any number of weights assigned to each vertex, this however becomes computationally expensive. Thus for interactive applications, such as games, a fixed number of weights are used. A total of four weights are assigned to each vertex of the mesh so that the computations can be performed at run-time. MotionMuse also follows this convention, i.e. 4 weights are assigned per vertex to modify meshes. Most common formats only allow four weights (such as GLB/GLTF) which have to add up to 1, for such cases when exporting to these formats MotionMuse normalizes the weights so that they add up to one.
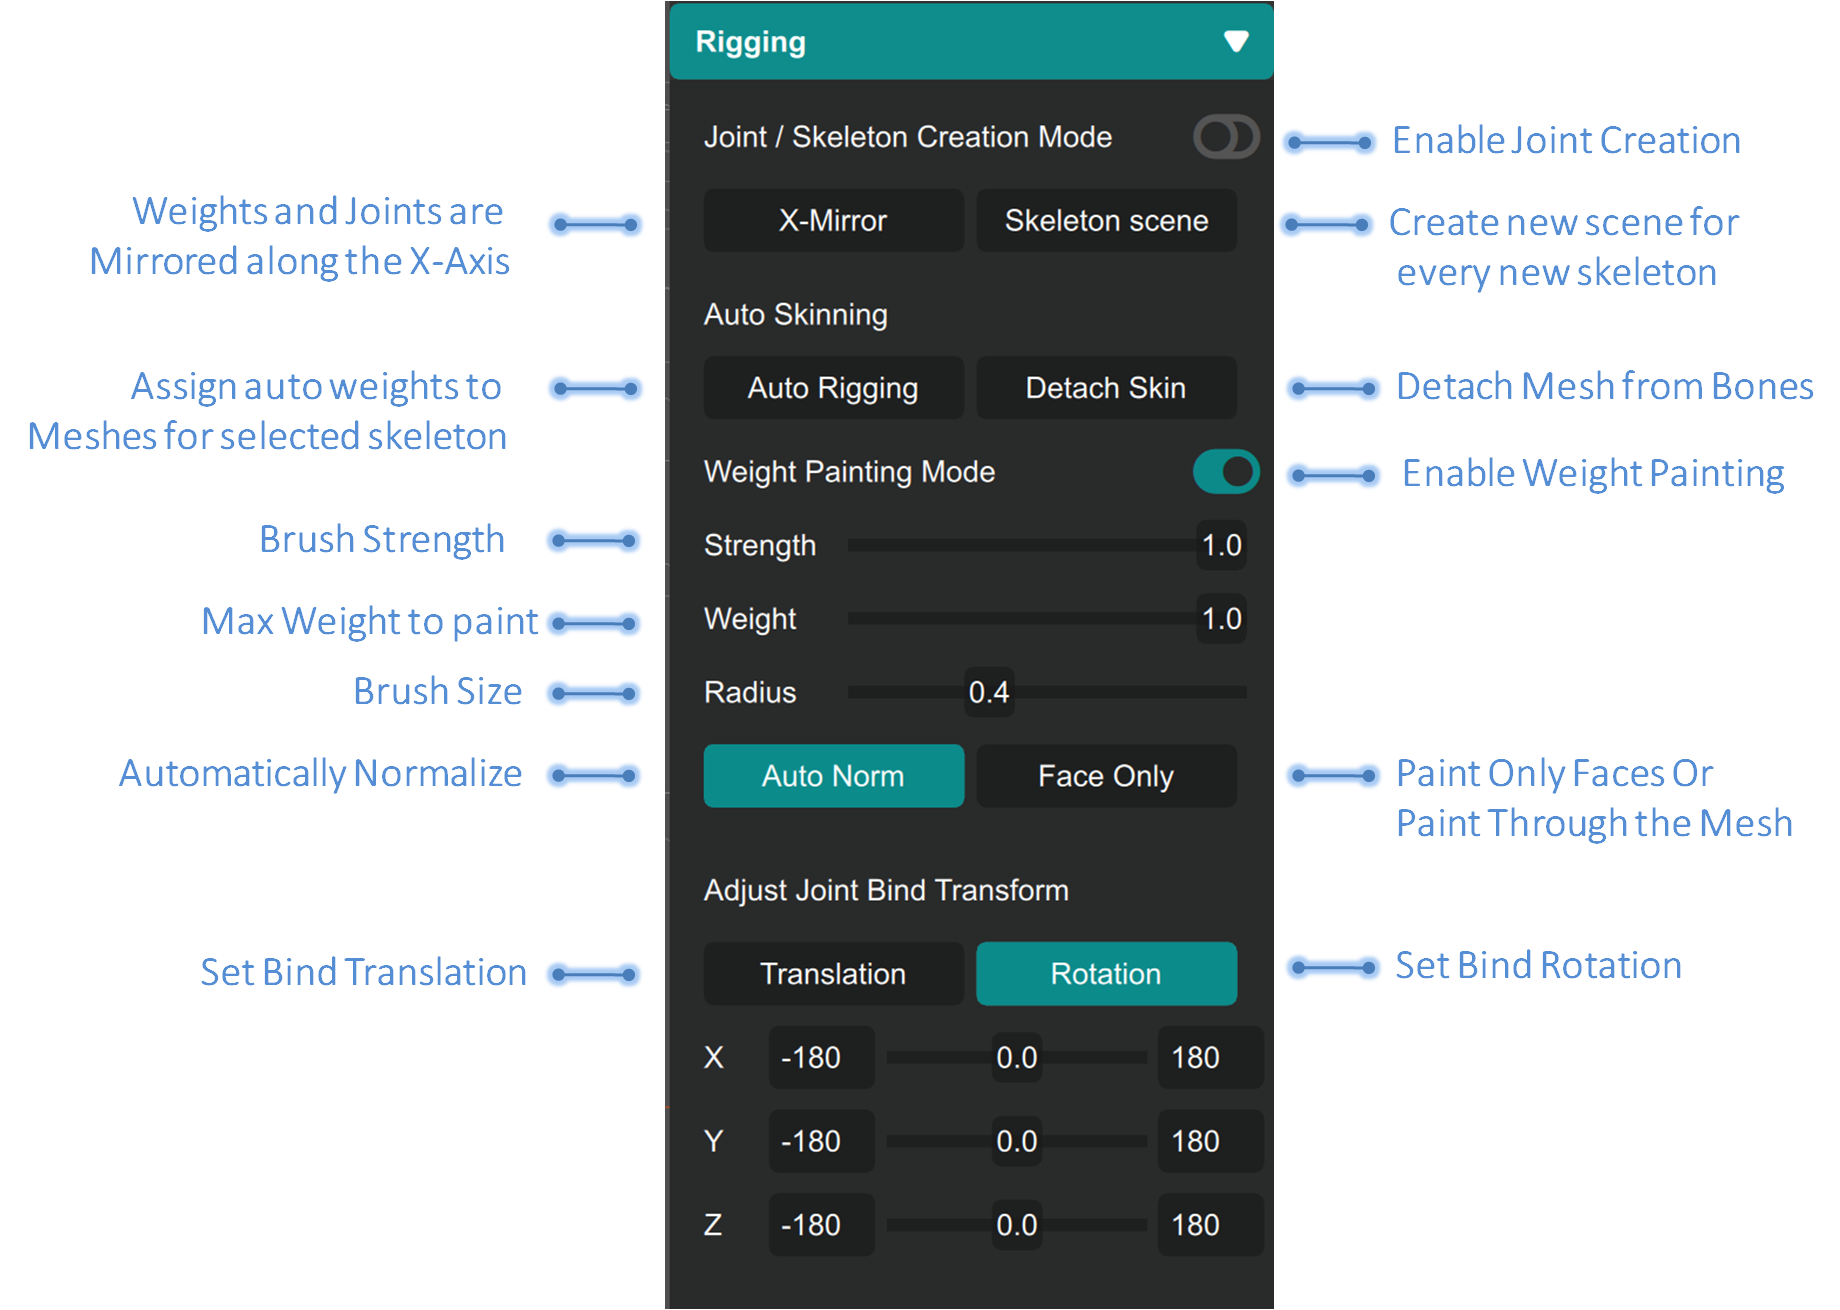
Weight painting is the process of interactively modifying these weights so that mesh deformations can be modified according to the user. In MotionMuse we provide a simple interface to modify weights interactively. To paint weights please have a look at the Weight Painting section in the “Rigging” panel on the right side, it contains the following:
To start painting weights first select at least one mesh and press the weight paint button on the Toolbar, which looks like this (or use the keyboard shortcut ‘D’).

Important Note: On some machines (especially older machines with Intel 4xxx and 5xxx series GPUs) compute shaders cannot be initialized. Since weight painting uses compute shaders to perform its operations both the weight paint button and the weight paint panel will be grayed out and the user will be not be able to paint weights.
Important Note: Weight painting tools do not allow the user to add new bones to vertices yet, this is a limitation of the current system, we are working on adding this feature in future releases.
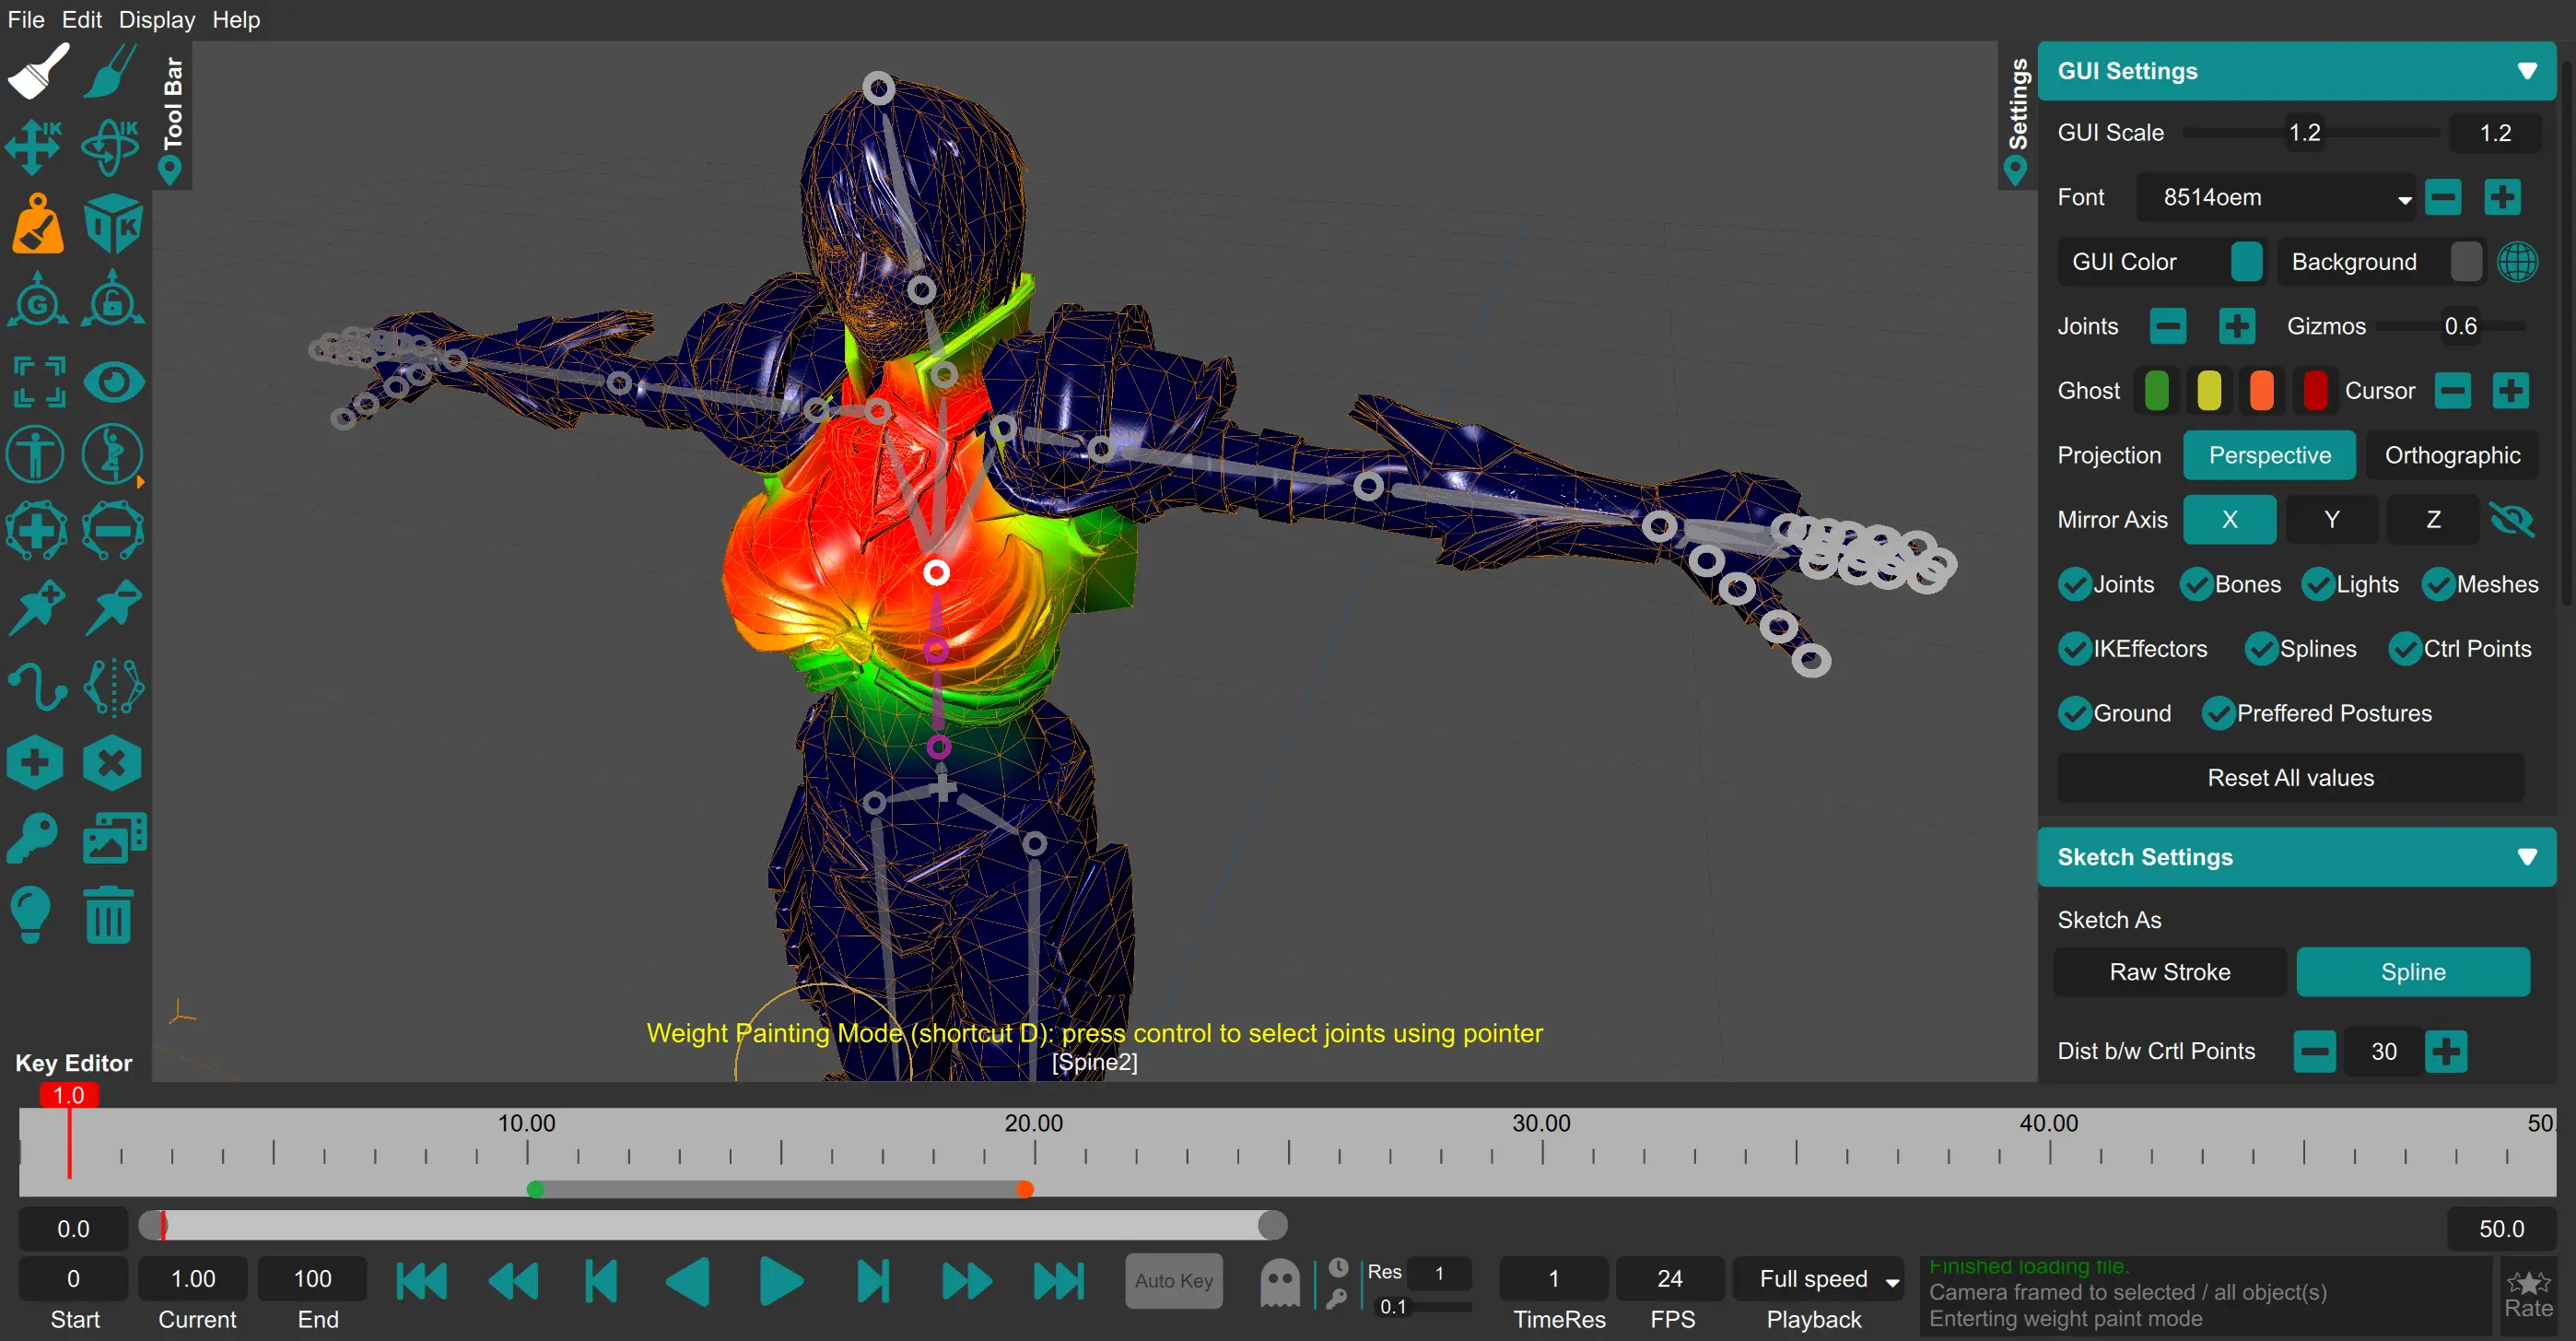
Once you enter weight paint mode the selected meshes will turn dark blue and the cursor will change to a cross with a circle around it. The circle indicates your painting zone. Currently MotionMuse uses a Gaussian falloff curve, i.e. the intensity of the weights is more in the center and falls off at the edges of the circle.
To paint weights for a joint you’ll first have to select a joint. You can do so by pressing the Control key, this will change the cursor back to a pointer using which you can select a joint (please note only one joint can be selected at a time in weight paint mode). Once the joint has been selected you’ll see its associated weights on the dark blue mesh(es) as a spectrum of colors ranging from blue to green to red, with blue being no weight assigned to that vertex, to green, yellow and orange for some weight assigned, and red with the most weight assigned. Hence moving the selected joint will affect the mesh according the colors shown for that vertex, with red ones moving the most and green vertices moving the least, as shown below.
Important Note: Only skinned meshes’ weights can be modified, if the selected joint does not belong to the Skinned mesh it cannot be added to the mesh (for now). Non-skinned meshes cannot be painted over in weight paint mode.
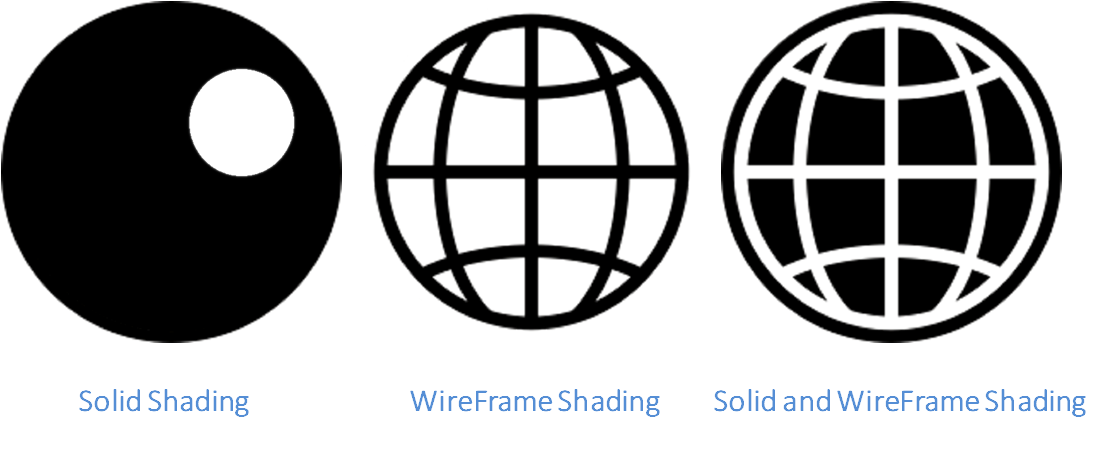
You can now modify the weights of the mesh using the brush – left mouse button adds weights to the vertices while the right mouse button deletes weights from the vertices. It is useful to see the vertices while painting weights, so it is advised that you toggle mesh and wire frame shading in the view-port to clearly see the vertices you are painting over. This can be done by pressing the “Viewport Shading” button in the GUI settings or using the shortcut ‘H’.

There are a number of controls in the weight paint panel that the user can use to ease weight painting. The user can easily control how much strength the brush has – using the ‘strength’ slider, and the size of the brush – using the ‘radius’ slider. The user can also set the maximum weight that he/she is allowed to paint using the ‘weight’ slider. There are also a few buttons below the sliders to help the user in some cases. ‘Auto Norm’ button automatically normalizes the weights across all joints, i.e. it makes sure the weights add up to 1 even if that means stealing weights from other joints. ‘X-Mirror’ enables the user to paint only one half of the mesh, the other half and its corresponding vertices will be updated automatically given that the character is aligned properly along the X-Axis. And the ‘Face Only/Through’ button allows the user to paint only faces pointing towards him/her or paint all faces throughout the mesh falling within the brush range.
The user can interactively paint weights and move the joints / bones using IK,FK and sketching in the weight paint mode to asses his/her progress. Once satisfied, the user can exit the weight paint mode by pressing the ‘Weight Paint’ button again or using the shortcut ‘D’. The new weights can then be exported if required.